Friday, December 27, 2013

COVER FOR MY ART JOURNAL


ART JOURNAL COVER
Rosin paper, gesso texture, collage


This is the front of the book cover for my art journal I recently completed.  Rosin paper can be bought at places like Home Depot and it's cheap cheap and comes in a roll that will last you forever.  My sister brought me a roll for Christmas!  We learned a technique at an art workshop several years ago where you take a sheet of this and put a thick-ish coat of gesso all over it.  Then you take items like combs, bubblewrap, bottle caps....anything  you have on hand...and you make marks all over the paper. Once that has dried, you take oil pastels and color the entire paper.  Use a variety of colors.  Then you take a paper towel or old cotton shirt and some elbow grease and you start blending the crayons until you have an overall look you like.  Once you've done this....the paper no longer feels like paper....it almost feels like leather.  Then you can rubber stamp, paint, collage...whatever you want.  The journal itself had a linen cover that was plain and boring...this is divine!  Here is the back of the cover...

Thursday, December 26, 2013

No Room for Dessert...but

Crustless Blackberry Pie

One final post about Christmas.  I'm not one of these organized people who knows exactly where my birth certificate is or my latest bank statement.  So when it came time to pull the Christmas dinner together....I pull out a folder (once I know where I put the folder last time I looked at it) and I start leafing through the papers....recipes from magazines, on computer paper, etc.  They are not in any order...just stuck in this folder.  It would serve me well to actually make some notes about our meal...how big was the roast, how did we cook it...what did we serve with it, what time did we eat....all of those little bits of information that would help when planning the next Christmas dinner.  Can't say at this moment that that is going to happen...

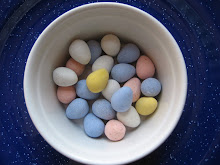
While I love the look of Christmas dessert and all of the amazing recipes that are out there....I usually don't have room in my system to eat it.  But you have to have something for dessert.  So I pulled out this recipe for Crustless Blackberry Pie....to me, that didn't sound too heavy after a big meal...AND it didn't sound difficult to execute.

When the roast came out of the oven to rest, I made the dessert.  It only needed 35 minutes in the oven.  This dessert was so easy to make....and it was so delicious....if I say so myself....I couldn't believe it.  I served it warm with whipped cream on top.  (Vanilla ice cream would have been good too).  

As we were chatting about the dessert while we were eating it, I left the table to grab the paper and see what magazine I had cut it out of....and this is where it gets amusing because somehow I've held onto this recipe for a very long time...fully intending to make it.  The recipe was from a February issue of SHAPE magazine....1999.  Yes...1999.  Maybe it was a Valentine dessert.  It was awesome.  I put it in pretty glasses,  not too big on the servings and it made for a lovely dessert!  I know my photo is not the best but you get the idea.  And, it wasn't overloaded with calories.  Now, this recipe has to go back in that folder because if it doesn't....if I think putting it in a "smarter" place will make it more secure??  Forget it...because I will only remember that it was in "that recipe folder"....waiting for Christmas 2014. 

A Little Bit of Christmas

 The Kitchen Cabinet
 Around the Kitchen Window
 Accordion Santas I Made
 A Santa I have collected
 A Santa I jigsawed & painted long ago
 A Beekeeper, Santa and little stuffed Santa
(I made the little one, painted muslin & stuffed)

 My Holiday Lampshades
The Kitchen Window

A Little Bit of My Christmas...The Tree

Cookie Tree

Little Holiday Giving Art Projects

Mini Art
For your desk or windowsill

These little paintings are done on half of a piece of a watercolor paper postcard and placed into a place card /photo holder. Some of the holders are clear glass like the one above and then a bird as below....


Some of them I have left open on the back for the recipient to add her own personal message/art.


This last one is a painting of a friend of mine's new home.  I placed each piece of art in a cellophane bag and gave these as small Christmas mementos for friends.  I had so much fun doing these little art projects!  Now you see why I couldn't post these before Christmas....

Monday, December 9, 2013

Tis The Holiday Season...

Dried Orange Slices

I got lucky and didn't have to dry these slices myself...purchased at one of our favorite discount stores...and I put a piece of twine through each one.  Originally, I was going to tie them all to my Christmas tree, but I decided to tie them to live garland for my kitchen window.  Will take a photo of that when the greenery is up....I feel like it's too early to put the live greenery up as it gets so dry....

 Cookie Ornament

I made these cookie ornaments years ago when my son was young and I polyurethaned them really well so they've held up great.  I don't put them in the attic because the extremes in temps would ruin them....and the mice would probably attack them even with the polyurethane! 

American Flag 
Flies at the top of my tree


Whimsical Metal Birds
above a wreath of apples & bay leaves

 That's all I have to show for today.  Back to work tomorrow.  The house is looking quite festive....hope yours is too. 

Thursday, December 5, 2013

ART JOURNAL - 2013

 Art Journal - Completed!

It's taken me a year to do this art journal (weekend artist) and I'm really happy with it.  It's very colorful.  I've learned a lot...about products and techniques...and also a little bit more about myself.  I look forward to starting a new one.  I really like this particular journal...the paper was great and the size of the pages worked well.  I don't know what my next journal will be, but I'm looking forward to starting it.  You just have to start....

Here is the last page....
I am left-handed....at least when I'm creating art.  I just traced my hand and embellished it...it's the holidays after all!

  Just have fun!


Holiday Lights

Holiday Chandelier Shades

After debating for awhile whether I should treat myself to these holiday chandelier shades....after all, they are limited to Christmas...isn't that frivolous?  Well, I caved and bought them.  I just recently took down my dated, brass chandelier and put up this black one.  I know I'm not showing you much of it...but the focus is on the shades.  The dining room will look festive!

Spool with Red Ribbon 

I'm showing you this spool...it's about 4 inches high and it's made of wood...and I love the spool and that's why I bought it.  Yes, the satin ribbon is beautiful....but there was something about the spool that spoke to me.  If someone had seen this and put it in a box and gave it to me for Christmas...I would be happy as a clam.  I'm only saying this because it's really very simple things that make me happy.  This spool just happens to be one of them.  So Merry Christmas to me.  


Saturday, November 30, 2013

I LOVE MAKING THINGS....

I LOVE MAKING THINGS!
 
The glue gun is killing me, but I love adding the baubles and sparkles to these little trees.  I don't know why I never did it before...but they are fun!  (You've seen my earlier post ...my ladies' night with Sis Boom...that got me going on the sparkle aspect....!)  I remember as a young girl gluing sequins to felt tree skirts....
Making things is so much more fun than shopping for gifts...I'm so sick of the ads for shopping for the "early bird deals"...kills the Christmas spirit. It doesn't take long to decorate these trees and it makes you stop and think about family and Christmas memories.  Now, unfortunately, the craft stores are already having their 70% off sales...it's not even December 1st....so good luck finding them....back to the internet. 
 
See the star hanging over my desk?  It's made of flocked red paper....I love it....it's not just going to be for Christmas.  I've been doing some painting but nothing I can show or it will give away some Christmas ideas I have in the works....I'm having fun!  Hope you are too.

Saturday, November 23, 2013

Inspiration from Sis Boom!


Art Journal
Mixed Media
Inspired by Sis Boom
On a magical evening 
Above is how my creative space looked today....I had so much on my desktop that I barely had room to work!  This always happens...I'm a messy artist.

 I went to a Ladies Night earlier this week....a night of creativity and shopping....The evening was hosted by fabric designer+, Jennifer Paganelli...aka, Sis Boom.  The pieces of paper are all Jennifer's designs. 
 (I also did a little Christmas shopping!)

 
We made the paper circles garland during the evening.  I ended up draping it as you see on my inspiration board and I love it. A close up below.

Here is my two-page journal spread:
 
  I used acrylics for the background... different shades blues, pinks, etc.  I took part of a polka dot napkin and glued it to the lower half of the right hand page. Across the top and down the sides of the pages are triangles cut from Sis Boom paper.  The colors are to die for!  Her evite had a Christmas tree which I printed and added to the left page along with Sis Boom Show.  On the right, I added a window that  I drew on a separate piece of paper, and painted a Christmas tree in the window.  When we approached Jennifer's home on this festive evening....there was a Christmas tree in one of her windows....so welcoming.  I took more of the paper scraps and created a Christmas tree on the right hand page as well as a Christmas gift, bottom right.  And I've added words to the pages....below are larger shots because the pages absolutely sparkle!
Above, the page has tiny sequin stars and sequin helixes and dots of glitter glue....it looks amazing.  The words ..."Creativity was in the air" and "Welcome."
 Below you can see better how the tree was formed.  My heart says "Thank you Jennifer PaganelliAnd top left it says, "A magical night". The Christmas box was created from her evite and I used glitter glue to outline it.


From this angle, you can see some of the shiny glitter glue drops.


Jennifer's evening was full of sparkle...you couldn't help but feel the joy of the holiday season in every corner of her home.  She truly inspired me!

Sunday, November 17, 2013

i imagine....

Art Journal

These pages started with a little bit of molding paste and a stencil on the left page. I painted an undercoat first on both pages.


 Then I did a coat of Midnight blue paint mixed with some glazing liquid over the entire page and let it set for about a minute.  Then I wiped the paint off.
I like the effect.  Then I added some turquoise blue here and there on the swirls and ultimately some gold. I sewed a button onto a piece of paper that I cut into a scalloped edged circle.  The detail of the button, which you can't see is that it looks like the background of the page.  There is also a striped button on the page.  The butterfly is decoupaged onto a piece of card stock.  I only have it glued down the center of the butterfly so it appears ready to take off....and I added two words...i  imagine.
The opposite page:
This page I also had painted the background.  And then I drew a wire birdhouse that I have...I like things made out of wire.  At any rate, it didn't have the whimsical quality that I was hoping for and it was really difficult to draw.  I think if I had used a pen with a smaller point it might have worked.  However, as you can see, the bird cage is nowhere to be seen.  I painted over the whole thing.  In it's place, you see a napkin that I decoupaged to the page.  I covered it with gloss decoupage to make sure the napkin was protected.  There is a small brass bird sitting on top of the Eiffel Tower.  And right in the middle of the compass is the word....fly.  I also added a nice piece of ribbon on the right side of the page.  Below is a close-up of the button/butterfly.  That's my weekend art! 

Tuesday, November 5, 2013

Paint & Wine Class....A Starry Starry Night

Another fun Paint & Wine class on Saturday night!  We were all searching for the "van Gogh" inside us.  Who doesn't love this famous painting....(not mine...his)!!!   While I feel mine is more "folk arty"....his is wonderful Impressionism.  And what makes his paintings so wonderful, besides the "energy" in them and his great use of color...is that he puts a lot of paint on the canvas.  In the class, I'm trying to capture the subject. Learning his actual technique is a whole different thing.  I have to say that everyone had a super painting and all unique in their own way. What would van Gogh think if he knew what an "impression" his art still makes today? 

Sunday, November 3, 2013

Altered Book Class Resumed

Altered Book
We resumed our altered book class on Saturday...our instructor wasn't able to teach it this past year, but we had our reunion this week.  So much going on on these pages....there was too much to do at the class, so I brought home lots of the pieces....and I changed the right page quite a bit.  For the class, the instructor had us work on an accordion book with tag pockets.  When I got home, I didn't like what I had put on the book pockets so I opted not to put the book in.  Instead, I created a large pocket down the right hand side and made pockets for the tags there...
 Here are the tags...they have designs on the reverse side as well.

 You can see on the right hand side, where the tags go into the pockets.

 These pages have lots of collage elements, metal attachments, the tags, the paper rosette, the pages on the right side are cut in increments and the edges cut in curves and zig zags. 
Saturday night I went to my monthly Wine & Paint class...haven't photographed that yet.  A day filled with art and creativity.